Unbroken v0.7.264 - Modular Ship Building
Dev Diary: Update 7
“Hi there, pilot!
Last week, we got confirmation from the CEO: our spacecraft supplier is now part of the Unbroken organization. This is absolutely massive for us! From now on, we are able to build our own ships and customize each and every module.
My team immediately ran simulations on a few sample configurations. To our regret, the power output of current generators is nowhere close to the power requirements of more complex ship designs. This morning, though - after pulling a couple of all-nighters - our scientists came up with a promising design of a new power source for our ships.
When your buddy Adam Pierce learned about the good news, he rushed into my office with a list of adjustments he’d like to be made to his ship. Of course, you can customize your ship to your liking as well. Just tell me what you need. We will make it work in no time.”
Christopher Redborough, Head of Engineering, Unbroken Organization
Release Notes
Gameplay
- player ship modules can be customized before a mission
- each ship module now consumes power
Content Update
- new ship module class: “Generator” (provides power for other modules)
- new “Generator” modules: “Nuclear Generator” and “Fusion Generator”
UI
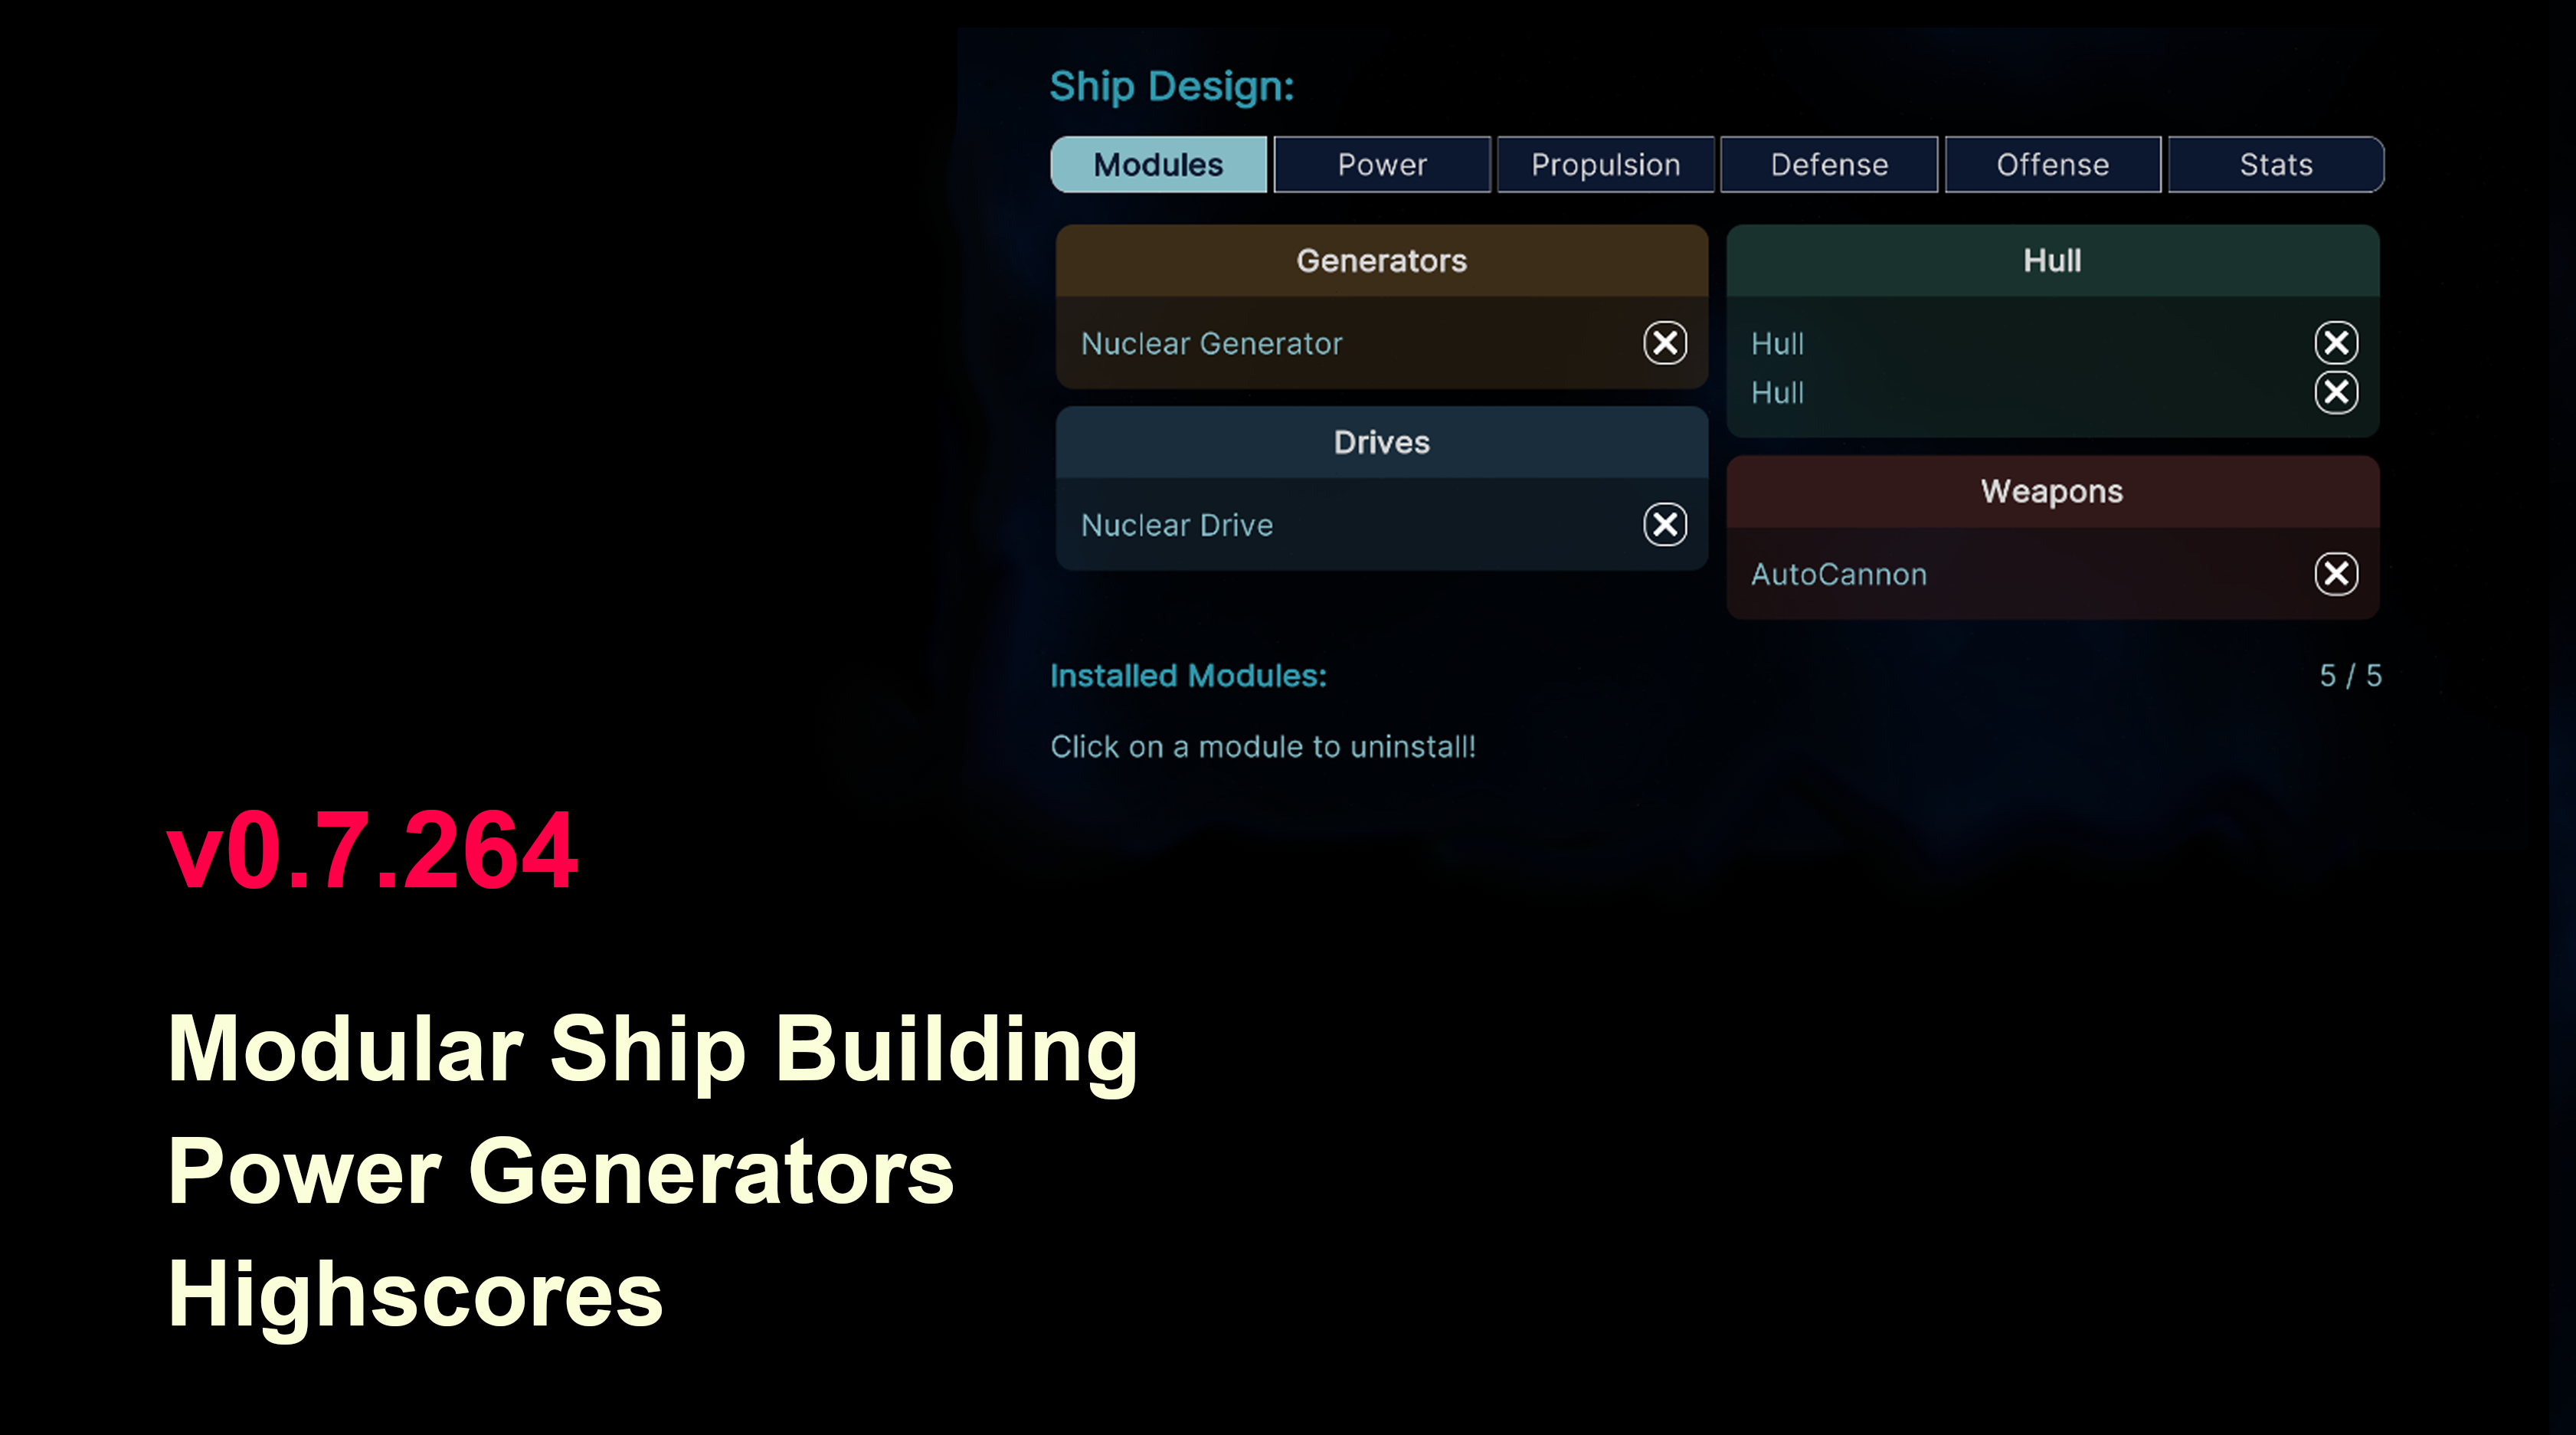
- new “Ship Designer” menu allows (un-)installing ship modules
- new “Highscores” menu shows the top 10 scores
Coding
- upgraded to Unity version 2021.3.8f1
- switched from legacy UI to the new “Unity UI Toolkit”
- dynamic UI elements are now generated via widget factories
Tech Talk
UI Toolkit
Following the recommendations of the official Unity documentation, I ditched the old UI framework and recreated all parts of the user interface (menus, HUD, game over screen) from scratch using the new UI Toolkit.
I figured, NOW was the best time to switch, since there are only a few menus already in the game and the longer I wait, the more parts of the UI would have to be rebuilt later on. Also, the new UI Toolkit offers some features that were going to come in very handy for the “Ship Designer” menu that is the main feature of the new version of Unbroken - Mankind United.
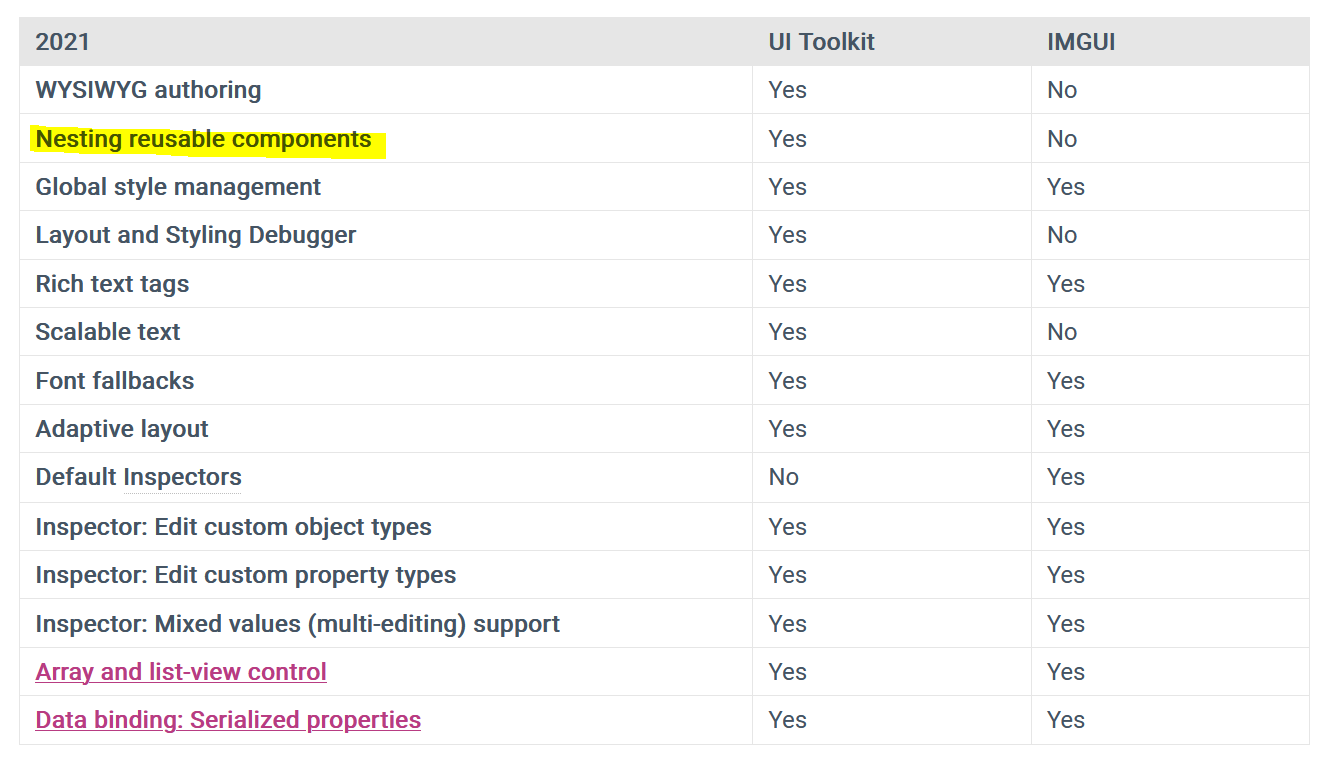
The table below shows a feature comparison of the old “IMGUI” framework and the new “UI toolkit”: The most relevant aspects for our purposes are:
- being able to assemble complex UI widgets from reusable building blocks
- being able to separate widget structure and style
The UI Toolkit does NOT rely on GameObjects being placed in the Canvas of a Scene anymore. Instead, the widgets we build in the editor are internally represented in the form of an object graph named VisualTree, which is persisted as an asset file. This means, all pieces of UI (let’s call them Widgets from now on) are independent from any specific Scene and can be reused as part of multiple other widgets. Also, their contained UI components aren’t descendants from the GameObject class anymore, but instead inherit from the new VisualElement class, which was designed solely for the purpose of building UI.
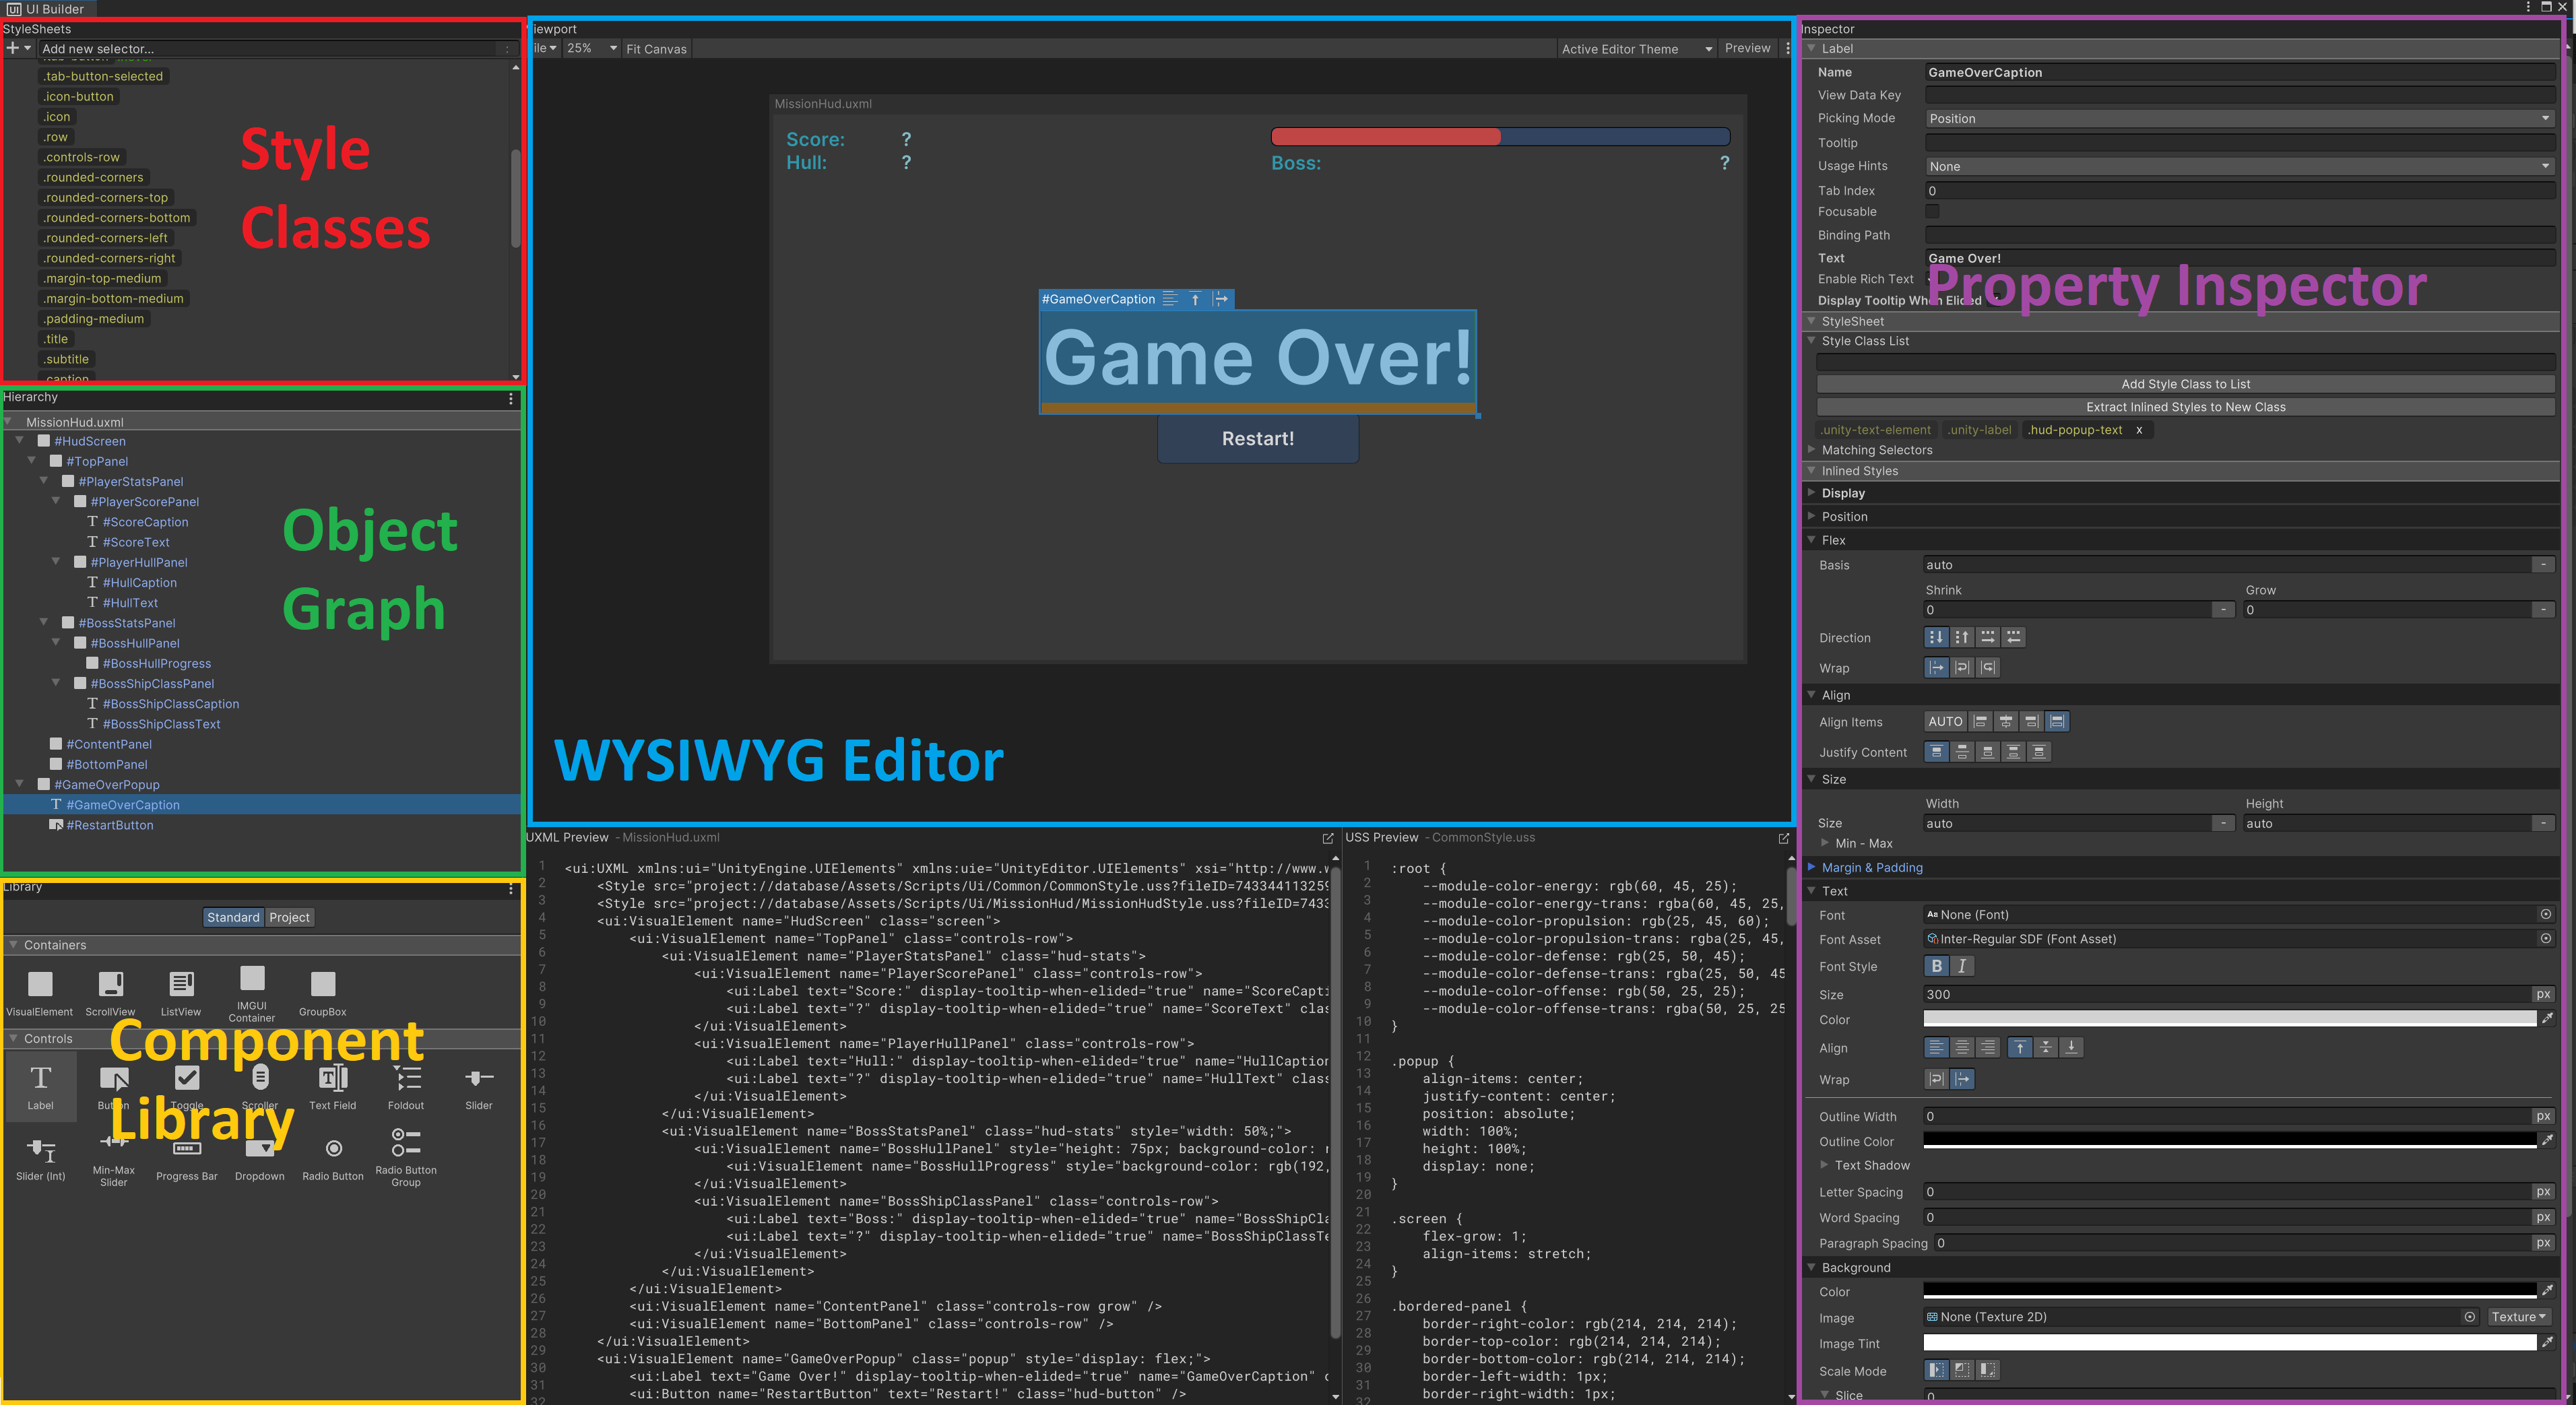
The UI Toolkit comes with the new UI Builder editor window, which allows for WYSIWYG authoring (= what you see is what you get). The StyleSheets section (top left) shows all stylesheets attached to the current widget along with all of their style classes. Here we can attach or remove stylesheets and also manipulate their style classes. The Hierarchy section (left) shows the object graph (VisualTree) of the currently edited widget. Here we can select any UI component and apply style classes or drag in new components from the Library section (bottom left), which contains standard elements (like labels and buttons) as well as all our custom-made elements. The Viewport section (center) resembles the Scene View and shows the UI the way it will look during runtime. We can even activate the preview mode to see the stylesheets in action (i.e. when hovering over a button). The Inspector section on the right works as expected. We can modify all properties of the component which is currently selected in the Hierarchy.
Widget Factories
With the old UI framework, we built UI by adding a Canvas to the Scene and manually placing UI components (like labels and buttons) within that Canvas. We then attached Controller scripts to that scene, which accessed the UI components in order to manipulate their properties during runtime (i.e. updating text of labels or reacting on button clicks). This is perfectly fine for static UI which doesn’t change in structure or layout. But we had no easy way to build dynamic UI, which changes its appearence whenever the underlying game data is modified.
Think about the upcoming “Highscore” menu. We don’t want to prepare 10 or more rows in the highscores table and then hide them until actual data comes in. We’d rather build UI dynamically from the current data at hand. If there are only 3 highscore entries, we only want 3 highscore rows in the Object Graph of our UI Document asset. As soon as the data changes, we can simply rebuild the UI for the new data.
Each of our widgets has a WidgetController script attached to it anyways, which initializes the widget state, accesses its UI components and handles user interaction. So, we could just add the extra code required to dynamically build the UI components as well, right? We could! But that would clutter up the scripts considerably. Therefore, we put that code into dedicated WidgetFactory classes. Each WidgetController which is supposed to build UI dynamically will receive a reference to a WidgetFactory, which encapsulates the logic of how to do so.
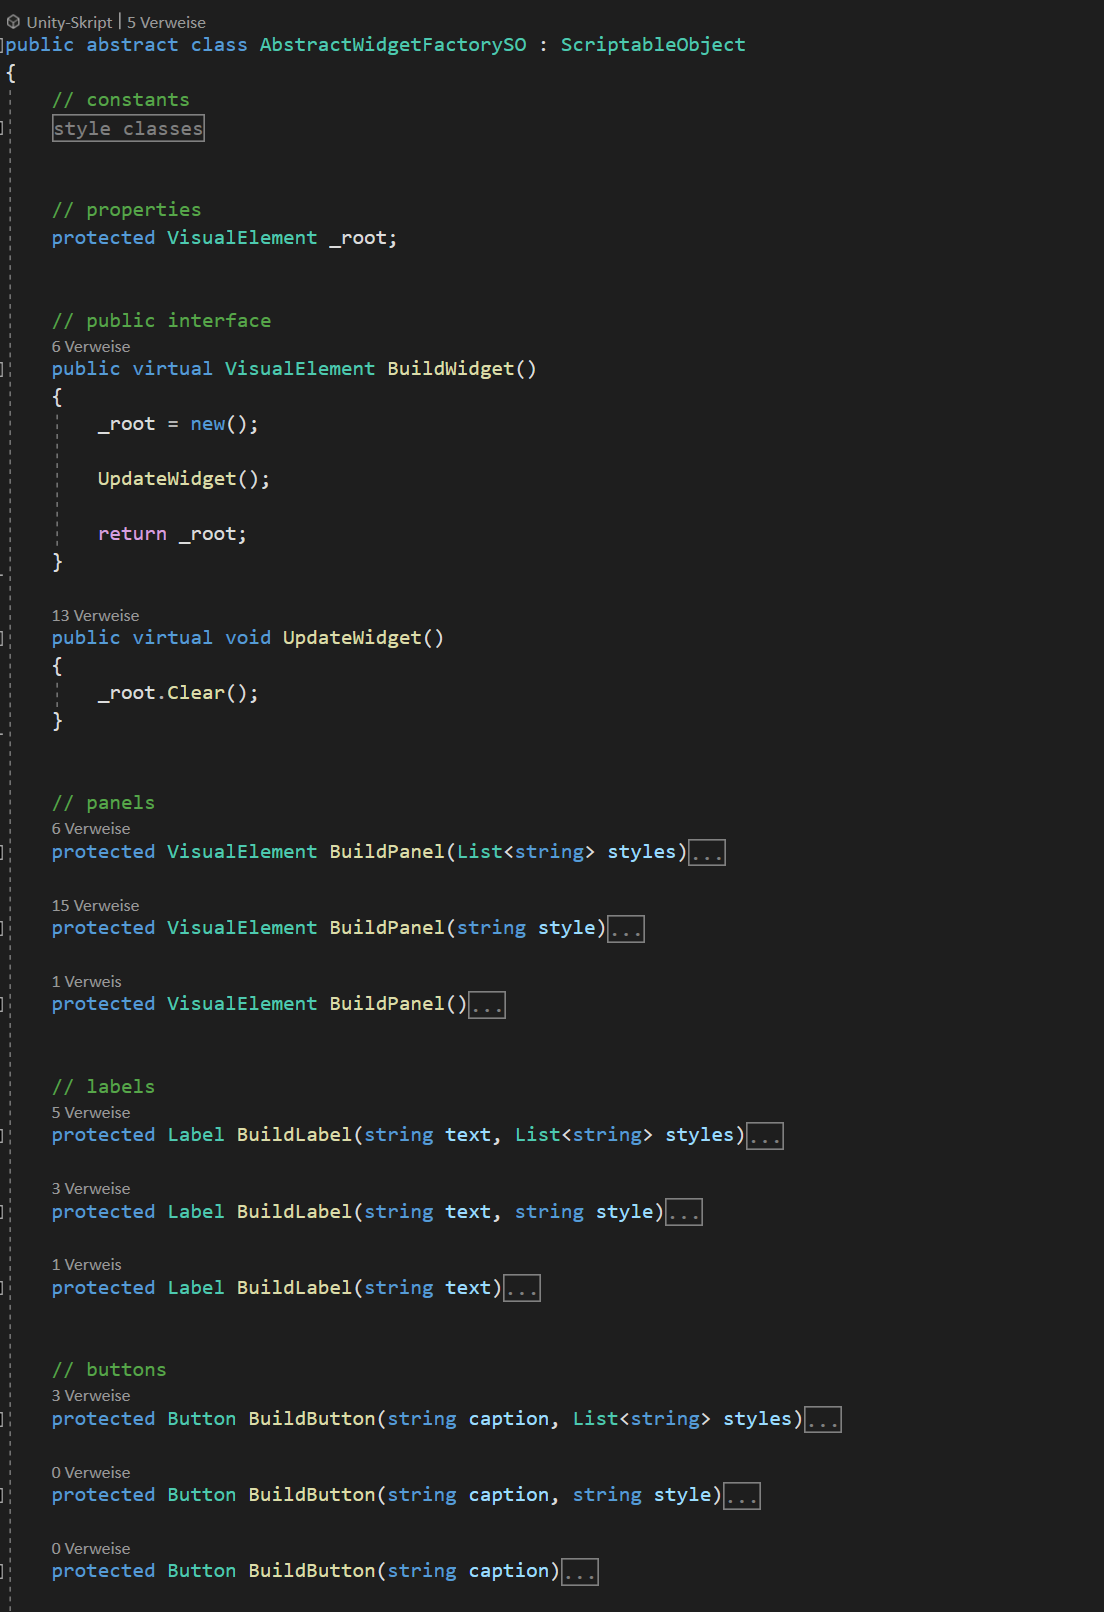
Most widget factories will have to build panels, labels, buttons and so on. Therefore we create an AbstractWidgetFactorySO class that implements all of these base functionalities as protected helper methods. It also receives public methods for building the widget in the first place as well as updating its content later on. All concrete widget factories will override UpdateWidget() and add their specific UI generation logic. They can optionally override BuildWidget() as well in order to add some initialization logic.
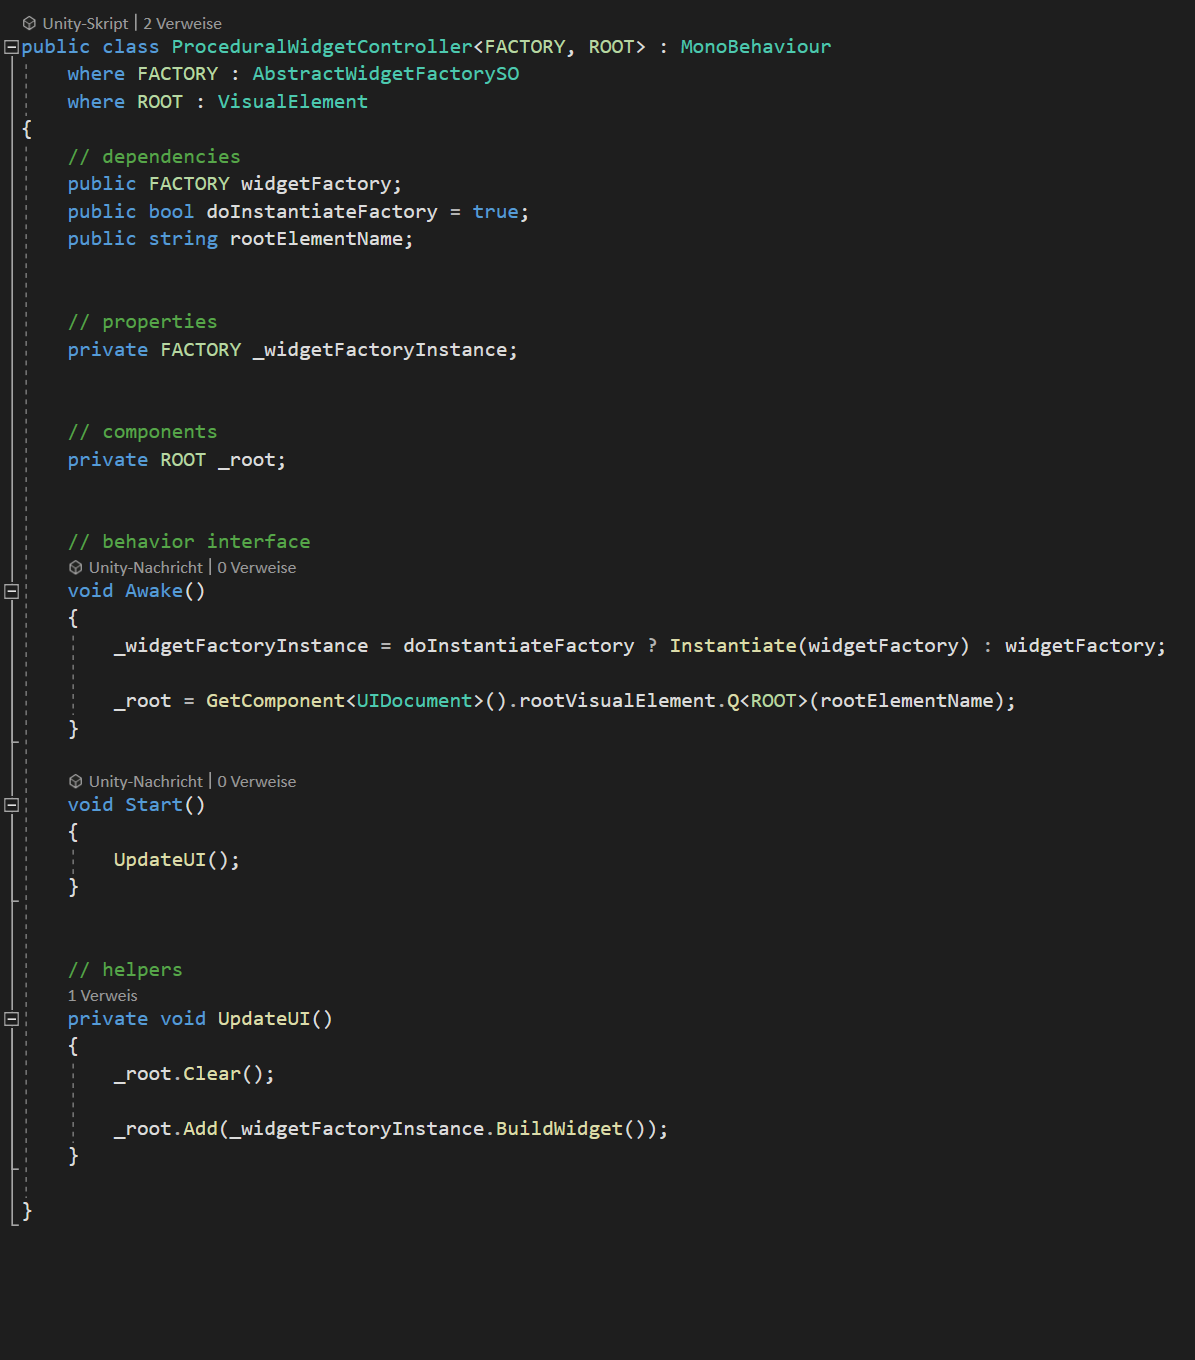
The WidgetController scripts of dynamically generated widgets will be pretty similar to each other. They receive a reference to a WidgetFactory, access the root element of their parent UIDocument and add to that root element whatever their factory is building. To make our jobs a bit easier, we can encapsulate that logic into a generic ProceduralWidgetController and simply reuse it for every new WidgetController.
Building a Custom Widget (TabGroup)
For the “Ship Designer” menu in this update, we want to display
- all currently installed ship modules
- the ship stats derived from the installed modules
- modules and stats relevant for each ship design feature
(i.e. Power, Propulsion, Defense and Offense)
This is a lot of information, which would be difficult to show on a single screen. Therefore, we will break up the menu into smaller screens each focussing on a certain aspect of the ship design. The screens shall be accessible via tab buttons at the top. In order to reuse the concept of tabbed screens later on, we create a generic TabGroup widget, which allows for pre-configuring the number of tabs, the name of each tab along with a factory class, which dynamically builds the corresponding screen whenever the player selects a tab.
For the Ship Design widget, this should look as follows:
We have no static UI here. Everything displayed below the tab buttons depends on the tab being selected and the tab buttons themselves (number and text) should be adjustable for each TabGroup we need in the future.
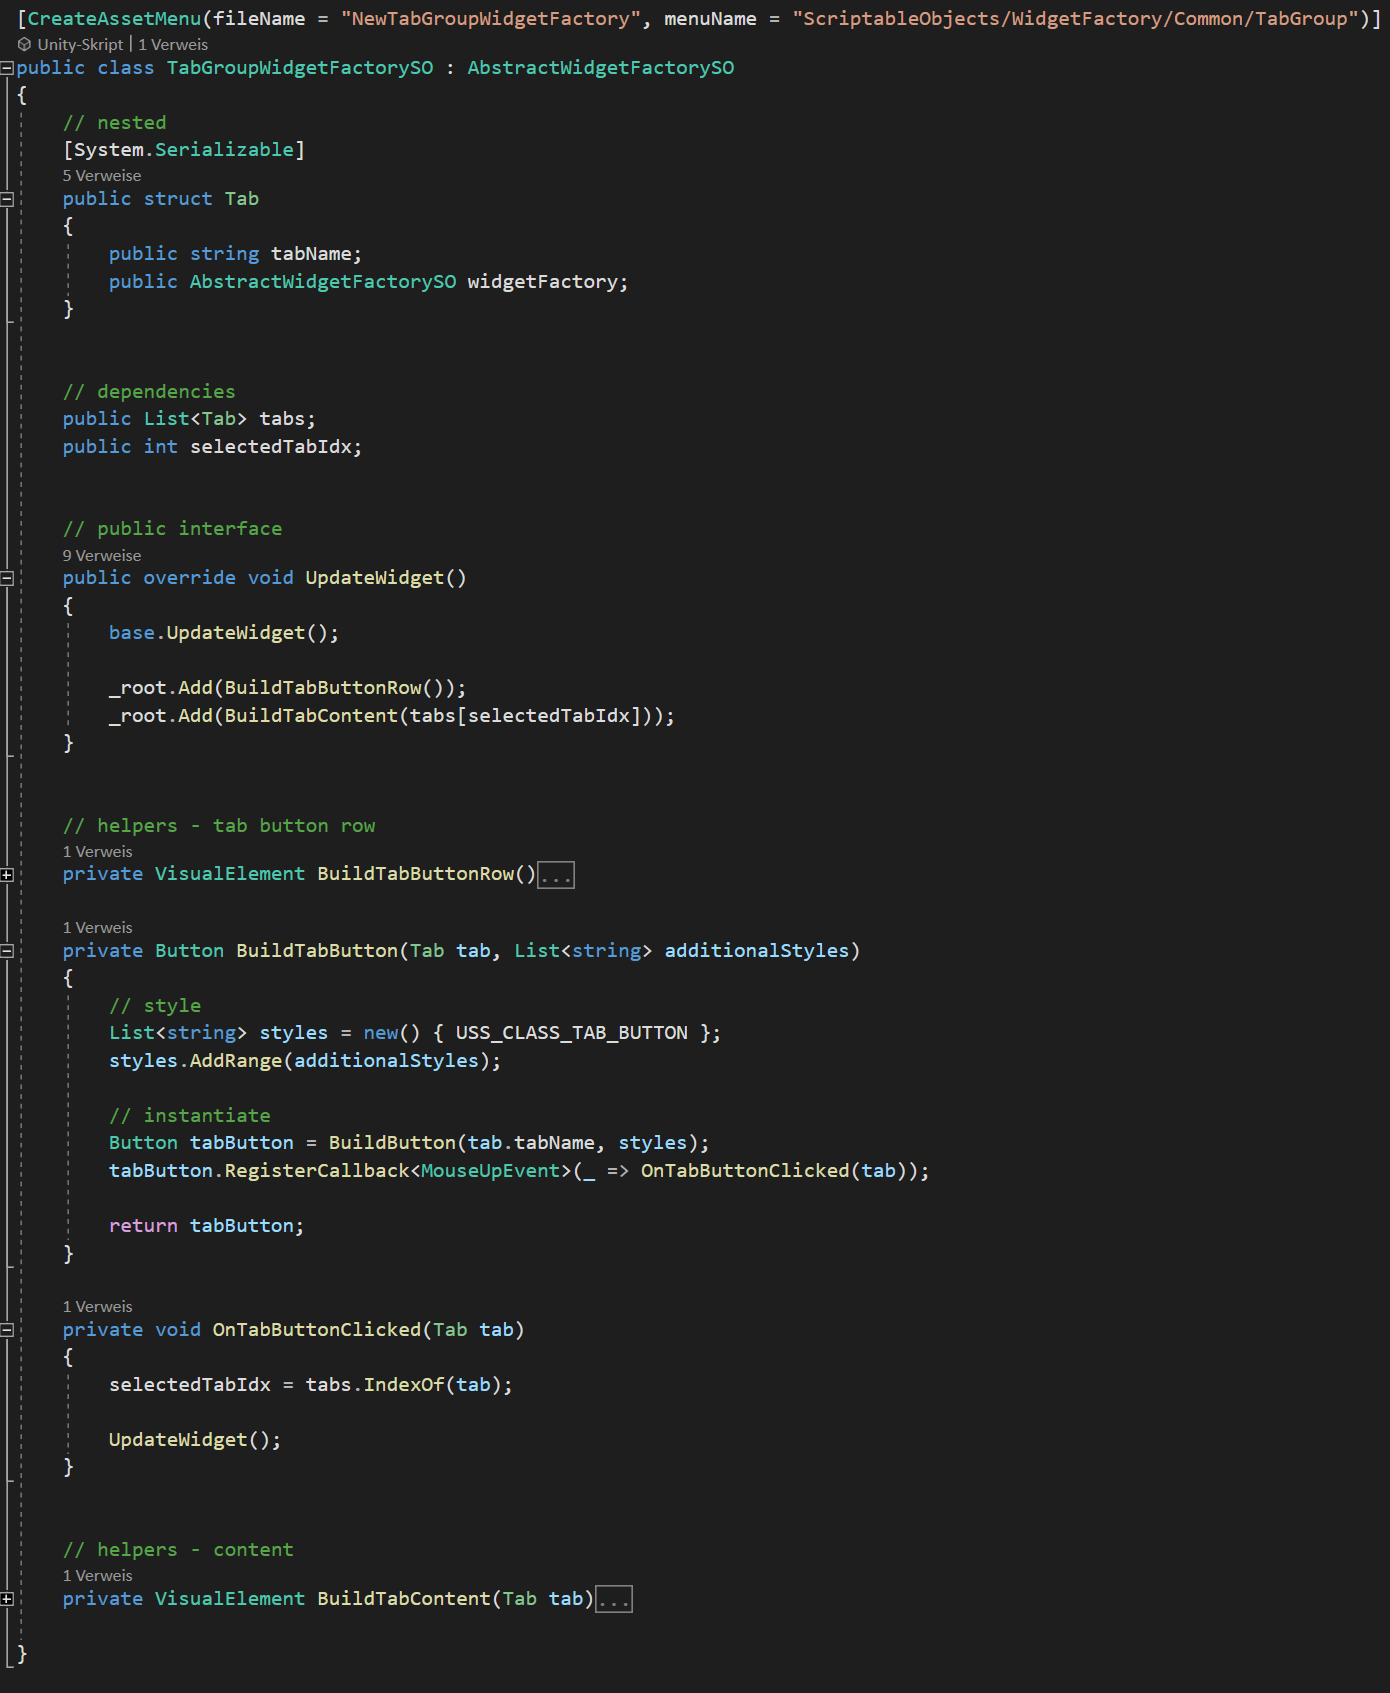
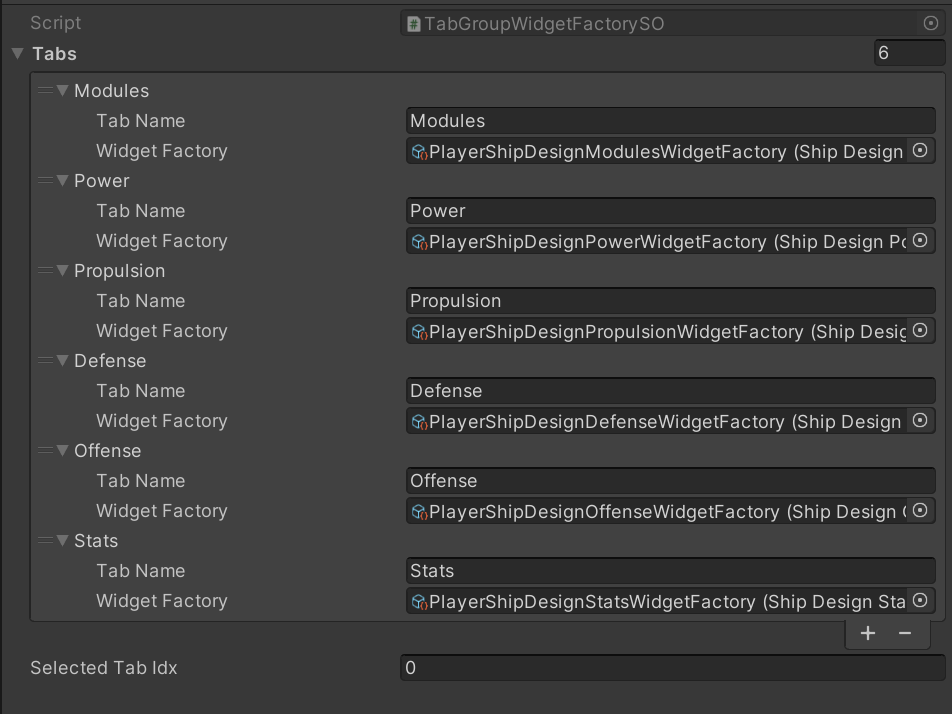
In order to make that happen, we create a new TabGroupWidgetFactorySO class. It defines a “Tab” struct, which is a pair of tab name and widget factory. Every instance of TabGroupWidgetFactorySO will receive a list of Tab objects as well as the index of the currently selected tab. Internally it simply creates a tab button for each Tab object in the list and attaches a mouse event listener to each button, which updates the selected tab index and then re-renders the widget.
Remember how we created helper methods for building panels and buttons in AbstractWidgetFactorySO? Thanks to these helpers, building the new tab buttons now simply consists of defining their stlye classes and calling the protected helper functions.
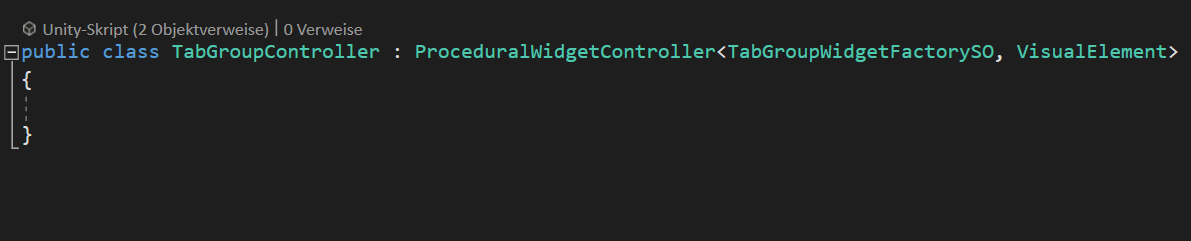
Creating the corresponding TabGroupController is even simpler. Since there is no static UI elements in the TabGroup widget, we can inherit from our ProceduralWidgetController without any additions being required.
Now let’s tie everything together!
First, we instantiate a new asset from TabGroupWidgetFactorySO and define the desired tabs in the inspector.
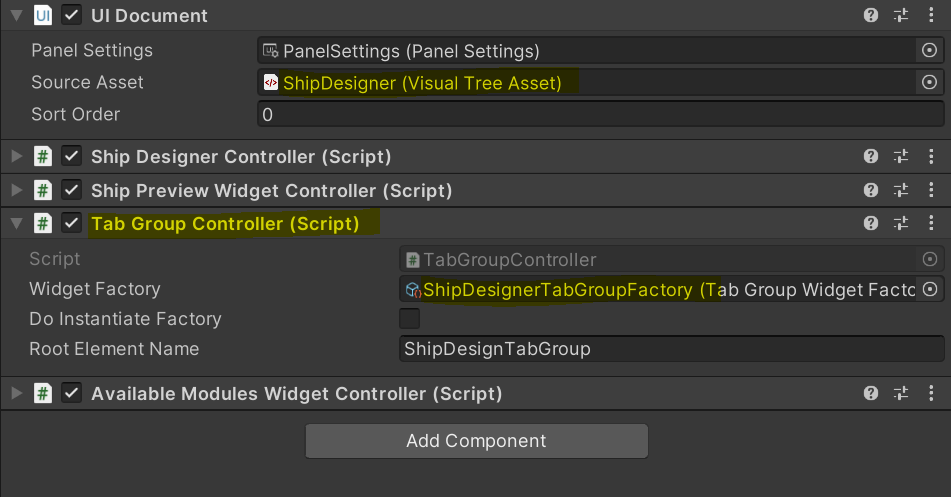
Now we attach a TabGroupController script to the ShipDesigner UI Document and assign our new factory asset to the controller.
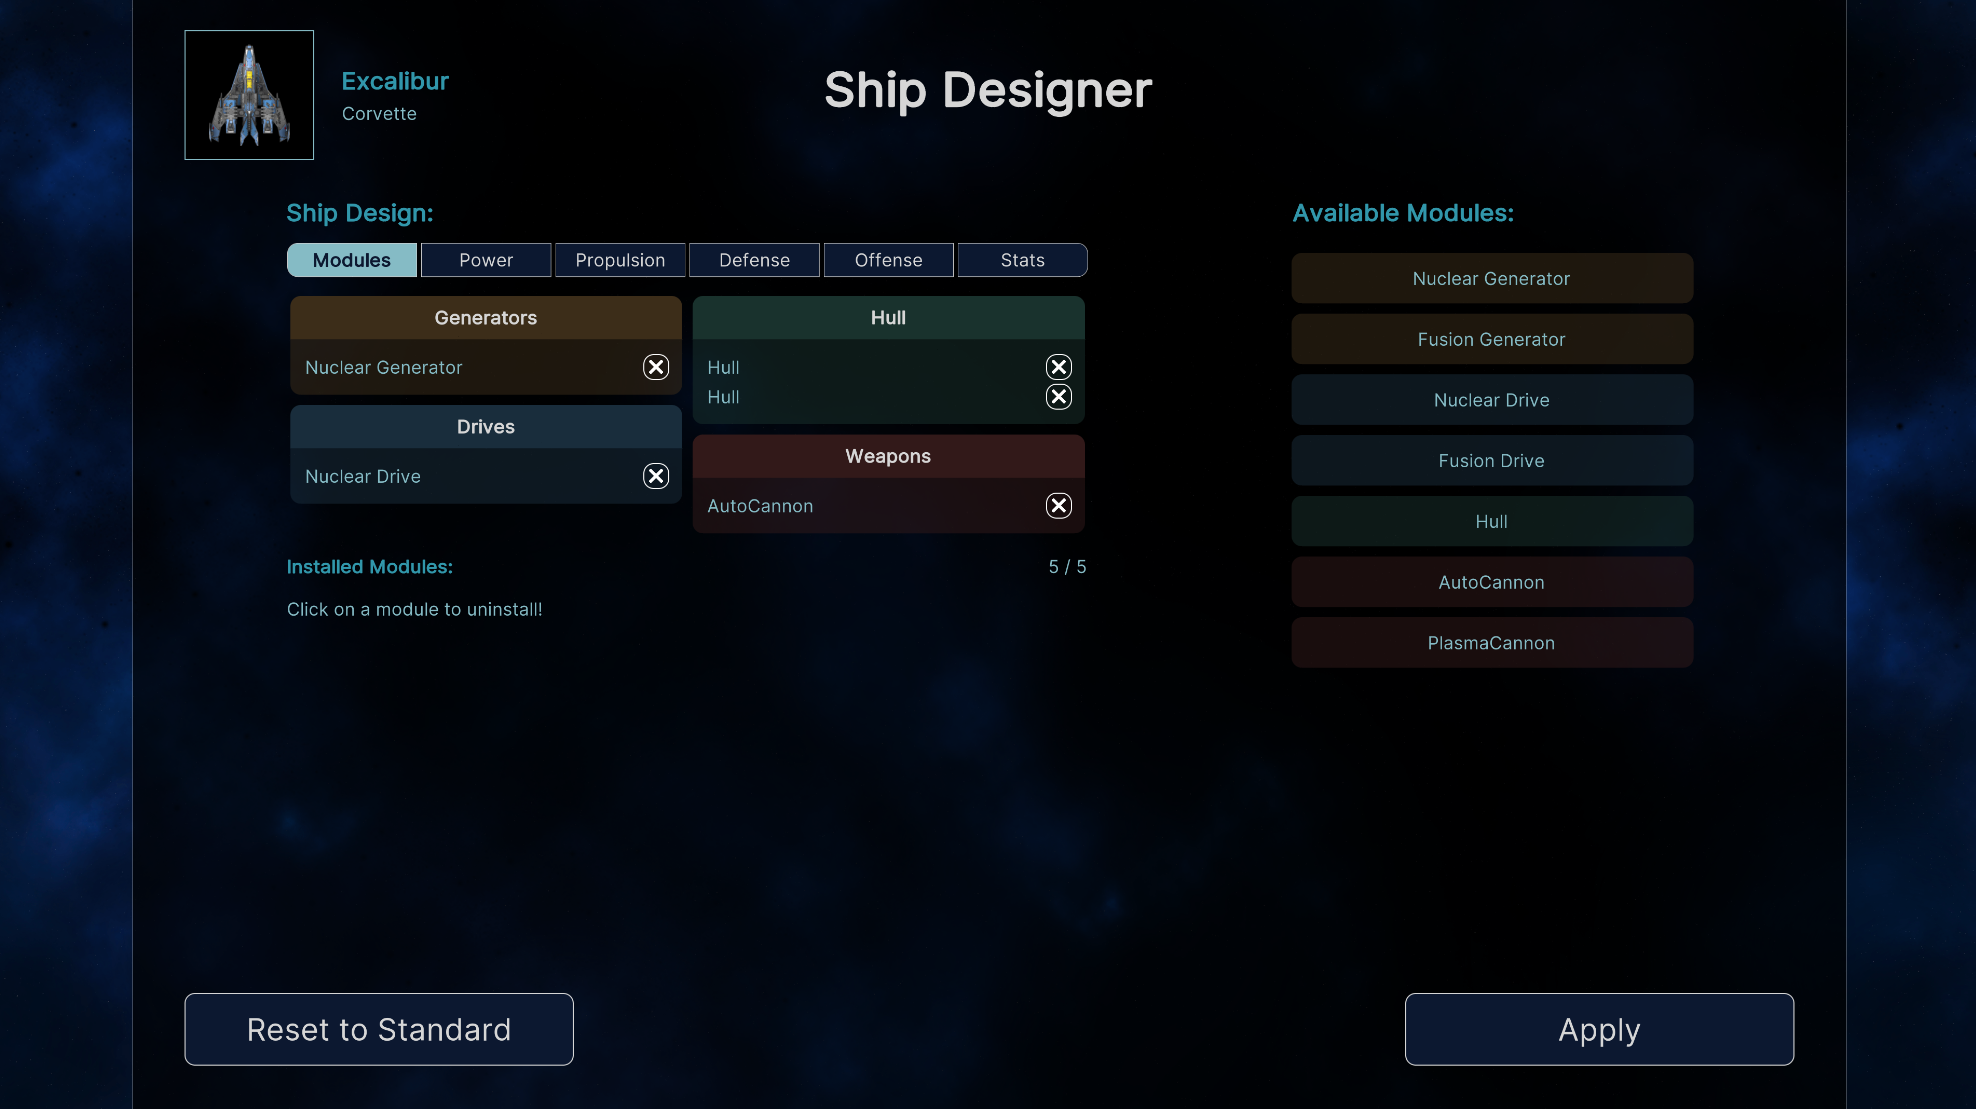
As a result, when running the game, the Ship Designer displays the content of whatever tab we select.
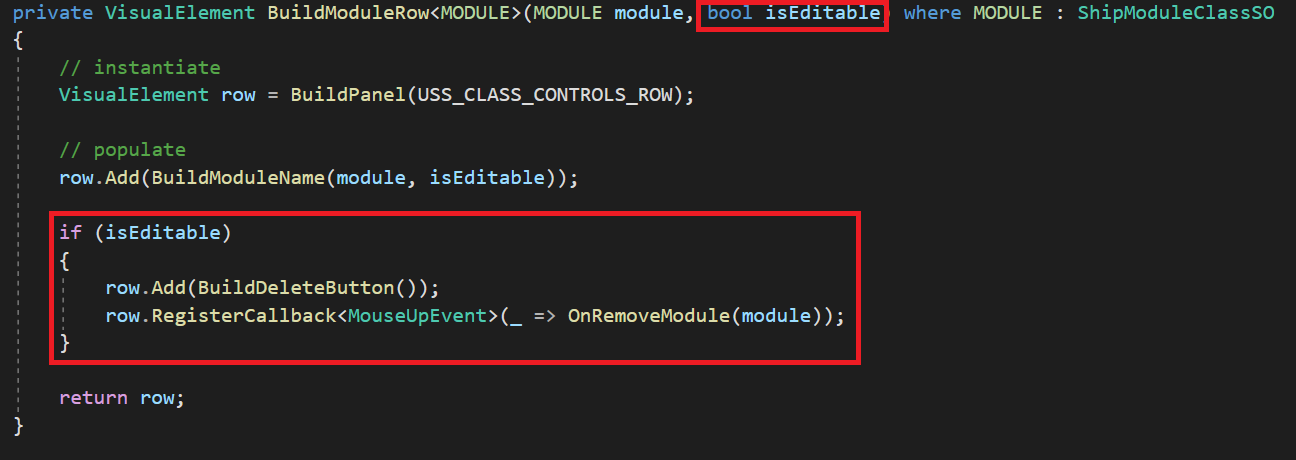
Since this widget is an asset, we can reuse it in several other places of our game. Actually, we could use a non-editable variant of the “Modules” tab for the “Main Menu”. We can achieve that by adding a variable called isEditable to the method that builds the module row. The “delete” button is only being generated, if isEditable is true.
The isEditable variable can simply be plugged into the repsecitve factory asset via the inspector. We create two instances of the same factory with the only difference being a check mark.
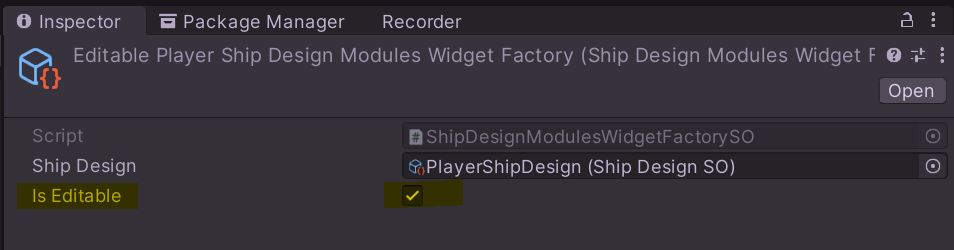
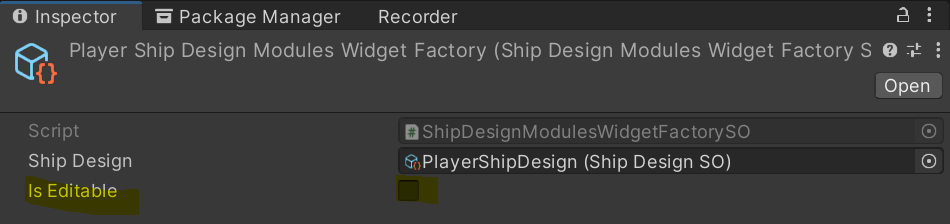
Et voilà, while the modules are editable in the Ship Designer, they are not within the “Mission” screen of the Main Menu!

Leave a comment
Log in with itch.io to leave a comment.